
What is Rug Tufting?
Rug tufting is a method of making rugs by pushing yarn through fabric using a tufting gun.
It allows you to create custom designs quickly compared to traditional rug making techniques.
This beginner’s guide to rug tufting will show you how to create your first rug step by step, even if you’re starting from zero.
In this guide, you’ll learn the exact step-by-step process, plus the tools and patterns that make your first rug come out clean, even, and professional.
Start Here (Beginner Shortcut)
If this is your first rug, follow this order:
The 10 Steps to Tufting Your First Rug
Tufting follows a simple order.
If you skip steps or rush the setup, you will see it later:
- skipped stitches
- uneven lines
- messy edges
Start with the foundation first.
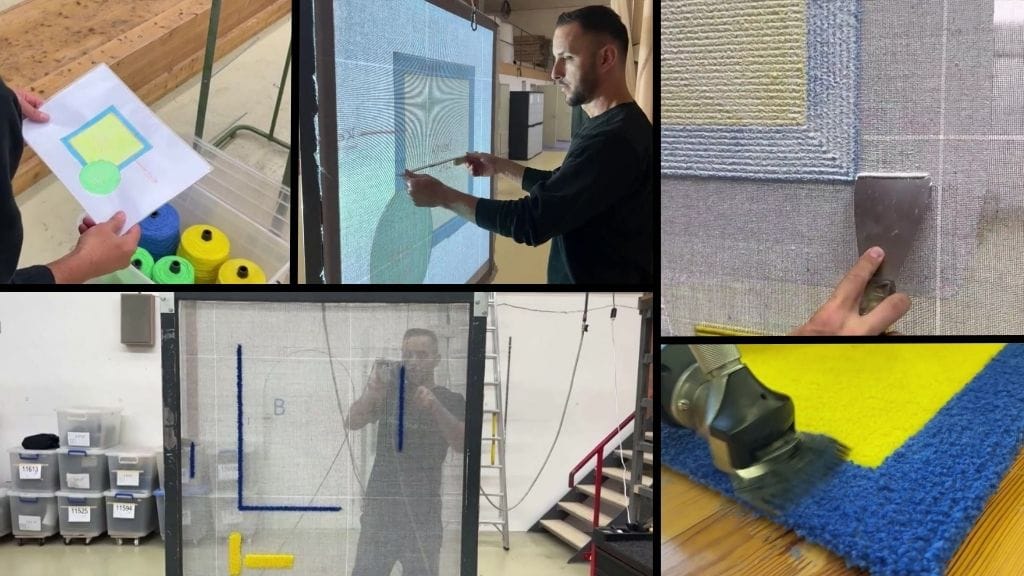
Step 1: Choose a Simple Design
Start simple.
Avoid detailed designs on your first rug. Stick to:
- color blocks
- circles
- basic geometric shapes
This helps you focus on control instead of complexity.
Step 2: Frame and Fabric Setup
This is the step most beginners get wrong.
If your fabric is loose:
- your stitches will skip
- your lines will look messy
What you want:
- frame = solid, no movement
- fabric = drum tight
If you tap the cloth, it should feel tight like a drum.
See my recommended beginner tufting frames on Amazon →
Step 3: Transfer Your Design
Once your fabric is tight, draw your design.
You can:
- draw it by hand
- use a projector
- trace a template
Clean lines here = cleaner rug later.
A Faster Way to Learn (If You’re Struggling)
Most beginners run into the same problems early:
- yarn not feeding properly
- uneven lines messy edges
- inconsistent pile height
These are hard to fix without seeing it done.

Kramis is a Swiss rug manufacturer that has produced work for brands like Rolex and Balenciaga. Their 10-part training shows the full process from setup to finishing.
Step 4: Set Up Your Yarn
Your yarn needs to feed smoothly.
If it pulls or snags, your stitching will be uneven.
Best setup:
- yarn above the frame
- smooth feed into the gun
Yarn cones usually work better than balls.
Step 5: Start Tufting
Now you start using the tufting gun.
Key rules:
- outline your design first
- keep the gun at a 90° angle
- move at a steady pace
- don’t stay in one spot too long
Important:
You move the whole machine, not your wrist.
Step 6: Fill in Your Design
After outlining, fill in each section.
Work in rows and keep spacing consistent.
If your spacing is uneven, your rug will look patchy.
Step 7: Trim and Shape
Trim the surface to even it out.
This is where your rug starts to look clean.
Use:
- scissors
- clippers
Take your time here.
Step 8: Apply Glue
Glue locks the yarn in place.
If you skip this or rush it, your rug will fall apart.
Pro tip:
Don’t rely on just one glue. A common setup:
1. spray adhesive to hold yarn in place
2. carpet glue for the main backing
3. hot glue for edges
Step 9: Add Backing
Backing gives your rug structure and durability.
It also makes the back look clean and finished.
Step 10: Final Trim
This is the final clean-up.
You:
- even out the surface
- shape edges
- refine details
This step makes the biggest visual difference.
Shop Vac with a high-efficiency filter to keep your studio air clean and your equipment safe.
Best Patterns for Beginners
If you’re starting out, simple patterns work best.
They include:
- printable templates
- yarn calculations
- beginner-friendly designs
Tools You Actually Need
The most important tool is your tufting gun.
If your machine is inconsistent, everything becomes harder.
You’ll also need:
- backing fabric
- yarn
- adhesive
- scissors or clippers
- See my recommended tufting frame for beginners →
Before You Continue
If your lines are coming out messy or uneven, you’re likely missing a key technique.
How Much Does It Cost to Start?
A basic setup usually costs:
$500 to $800 total
See my complete tufting equipment list on Amazon to compare prices →
After a few rugs, most people recover this cost.
Want to Turn This Into a Business?
Once you understand the process, you can start selling rugs.
Beginner’s Guide to Rug Tufting FAQ’s
Yes. Most people can finish their first rug in a weekend with the right setup.
A basic setup costs around $500 to $800 depending on your tools and materials.
A 24×24 rug usually needs:
8–10 balls of yarn
Simple geometric designs with 2–3 colors.
Yes. Many people start selling after a few projects once their quality improves.
Wool is best for durable rugs. Acrylic works for practice or wall art.
Final Tip
Your first rug will not be perfect.
Focus on:
- clean lines
- consistent spacing
- good finishing
That’s what makes the difference.
