
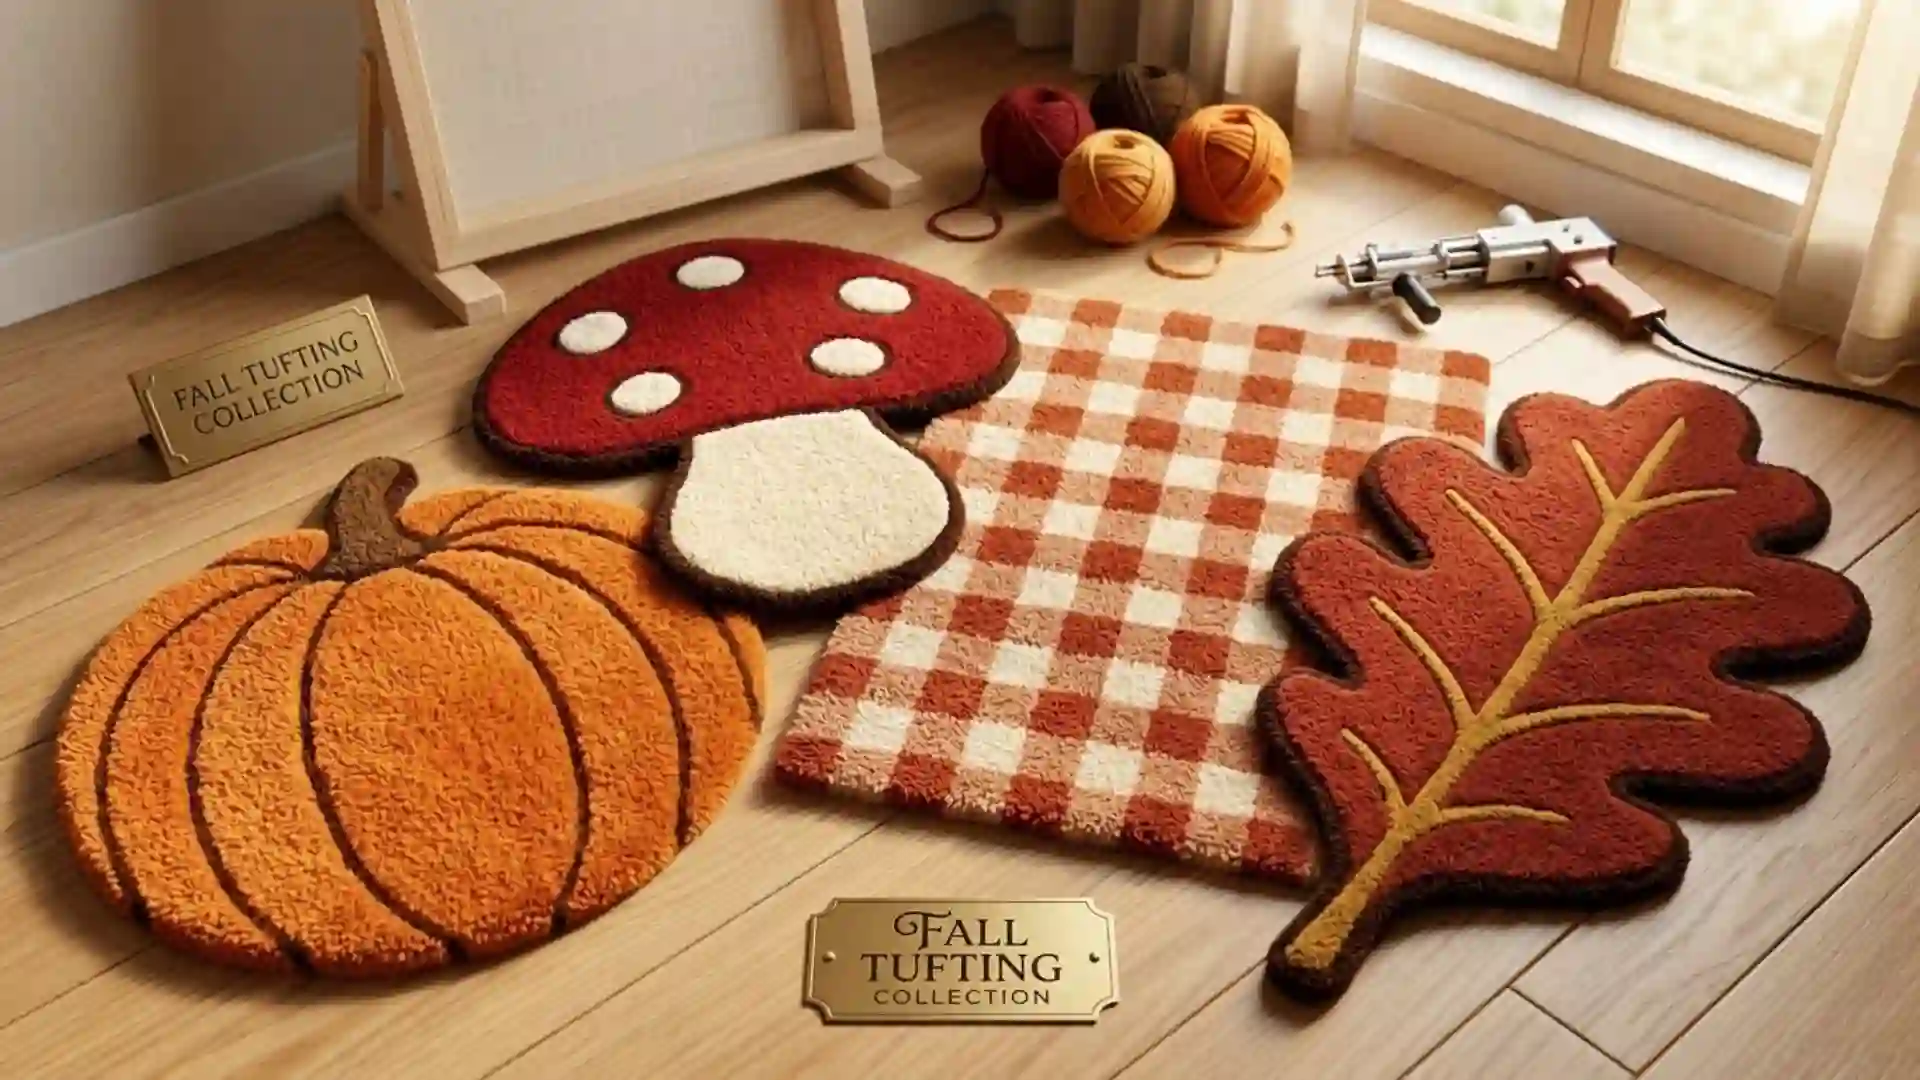
If you’re ready to try fall rug tufting patterns this season, you’re in the right place. These four designs are simple enough for a first-time tufter but still give you that cozy, autumn look you can display all season long or gift to someone who loves fall as much as you do.
Each pattern below works with a standard tufting frame and beginner-friendly yarn weights, so you don’t need advanced skills to get a clean result.
If you’re new to rug tufting, check out The Complete Beginner’s Guide to Rug Tufting here.
Pumpkin Tuft Pattern
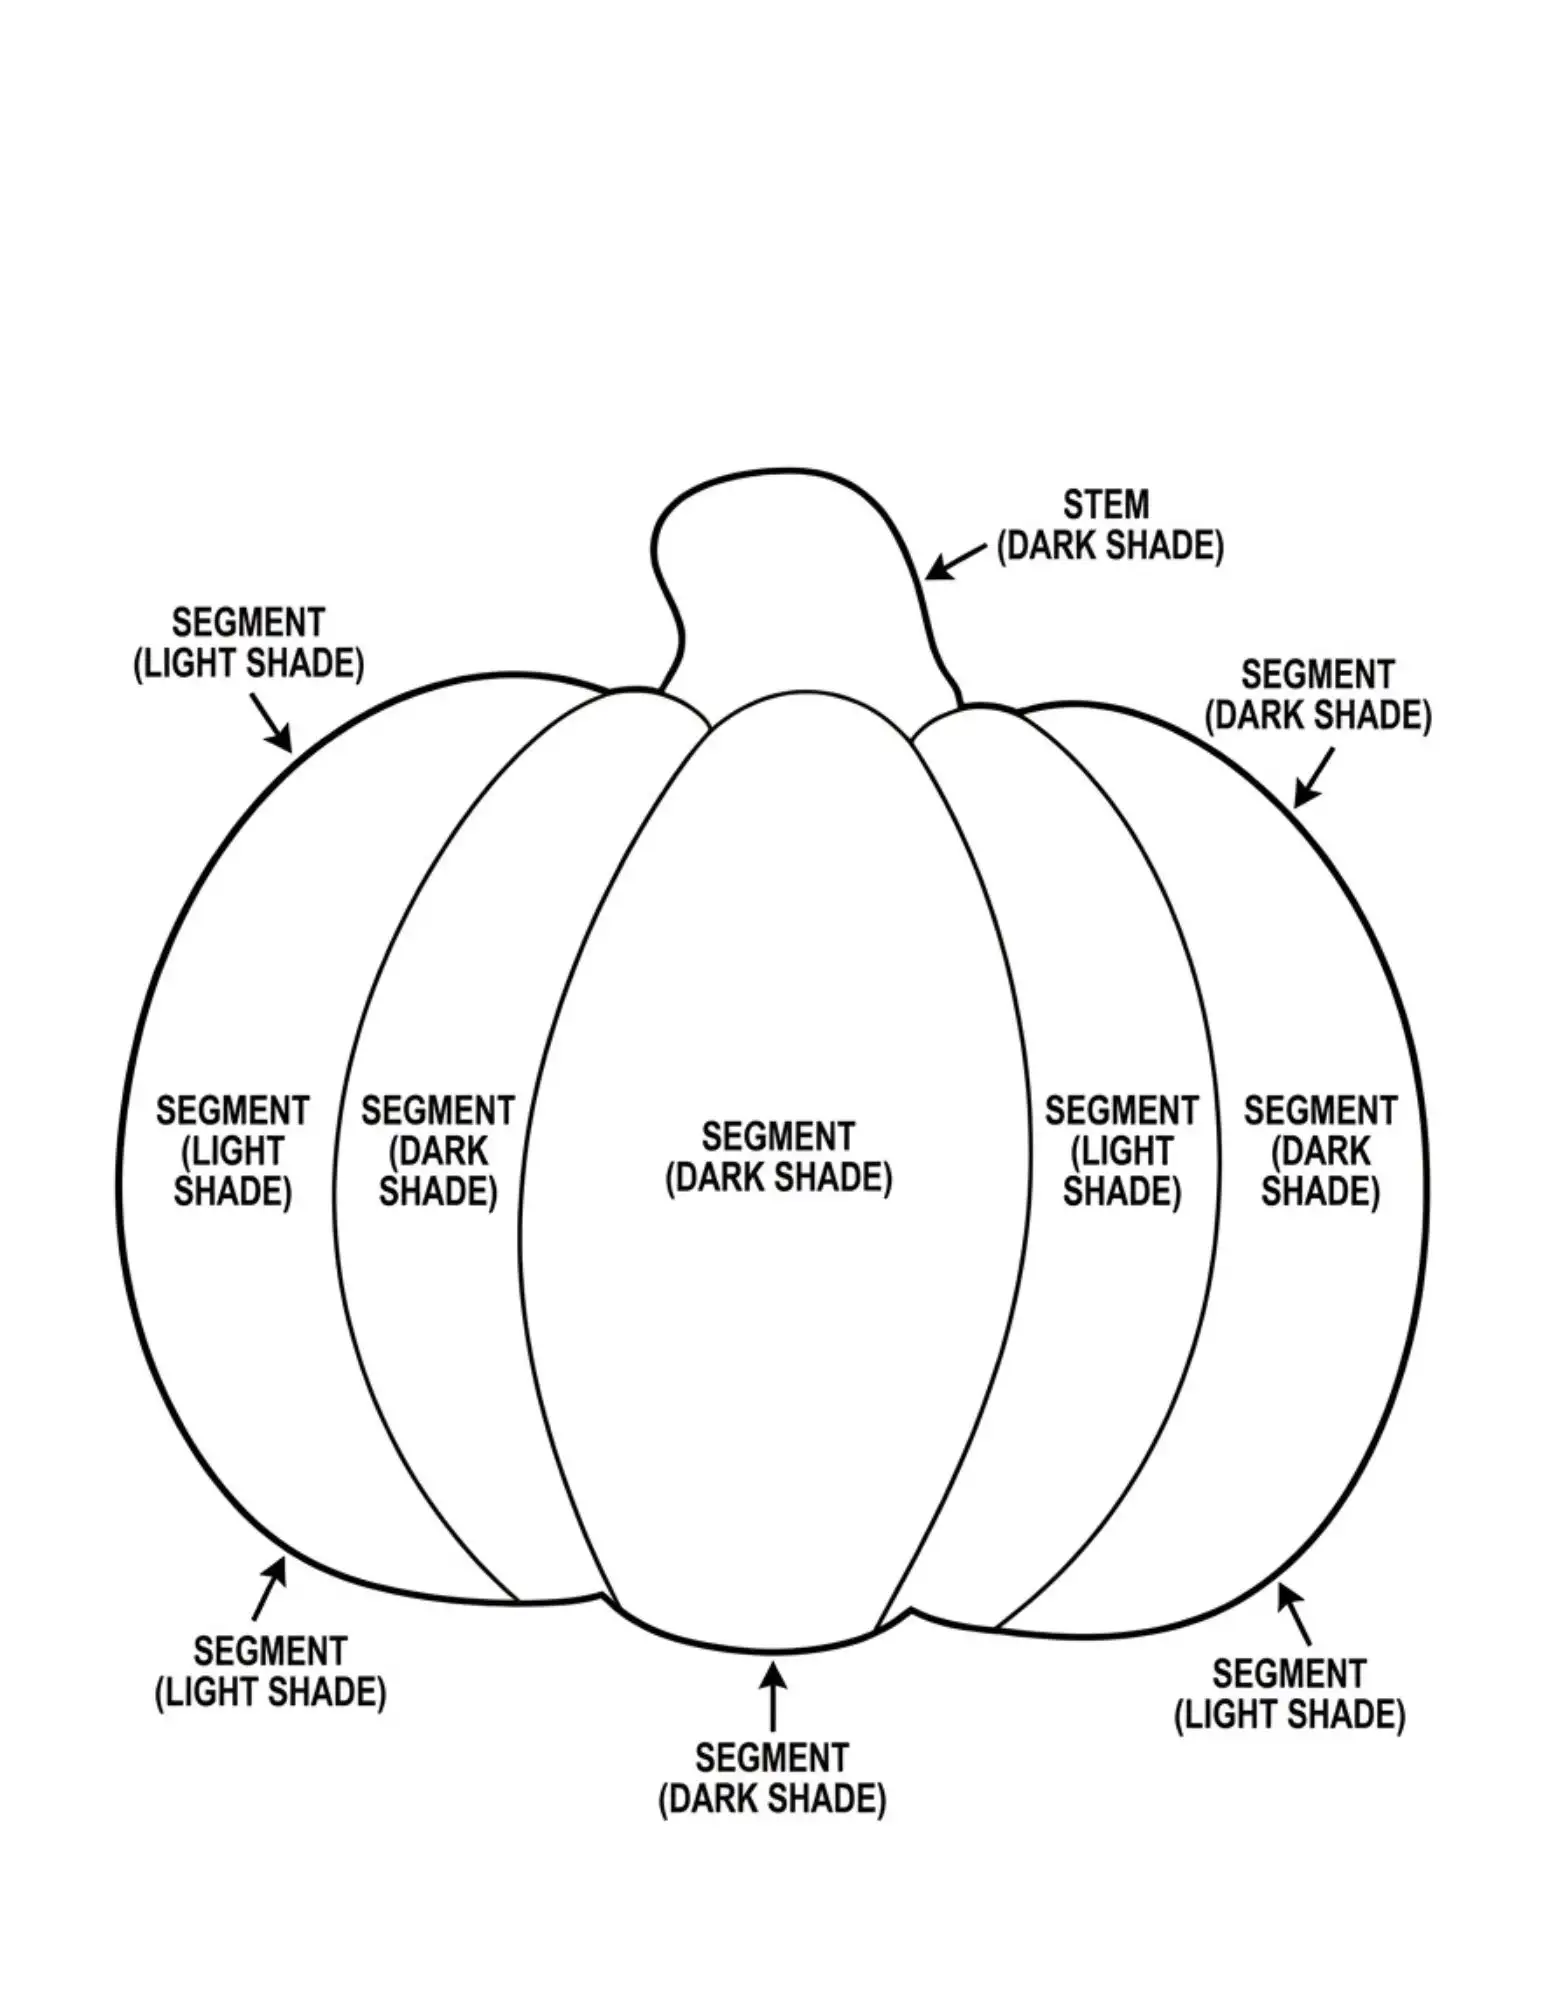
A rounded pumpkin shape with a simple stem is one of the easiest fall rug tufting patterns to start with. With generous curves and zero sharp corners, it is the perfect project for mastering gun control, consistent line spacing, and basic beveling.
Pattern Overview & Color Map
- Stem: 1 section of Olive Green or Deep Brown.
- Pumpkin Body: 5 vertical segments transitioning across 3 shades of orange (Dark Orange on the outer edges, Medium Orange, and Light Orange in the center).
Yarn & Equipment Setup
- Recommended Yarn: Red Heart Super Saver (Worsted Weight #4 Acrylic). It’s budget-friendly, forgiving, and easily available.
- Strand Count: Thread 2 strands of yarn into your tufting gun simultaneously throughout the entire project. (Pull one strand from the center and one from the outside of your skein, or wind two separate yarn cakes so they feed smoothly without tension).
- Tufting Style: Cut pile. Tuft your parallel vertical lines roughly 0.25 inches (5–6 mm) apart to achieve a dense, plush finish that completely covers the primary backing cloth.
Step-by-Step Tufting Instructions
- Trace the Outline: Project the flat pattern outline onto your stretched monks cloth and trace all section boundary lines with a thick marker.
- Tuft the Stem First: Thread two strands of olive green or brown yarn. Outline the stem shape first, then fill the interior with tight, parallel vertical lines.
- Tuft the Pumpkin Segments: Switch to your orange shades. Outline each individual pumpkin segment first to establish crisp boundaries, then fill them in section by section from darkest (outer edges) to lightest (center).
- Shear & Carve for 3D Dimension: Once the rug is glued, backed, and off the frame, use duckbill scissors or a rug carver angled at 45 degrees along the traced lines where two different orange shades meet. Trimming a shallow “V” groove along these seam lines creates the dramatic, corded 3D ridge effect of a real pumpkin without requiring complex multi-strand yarn setups!
Mushroom Tufted Rug (Beginner Pattern Instructions)
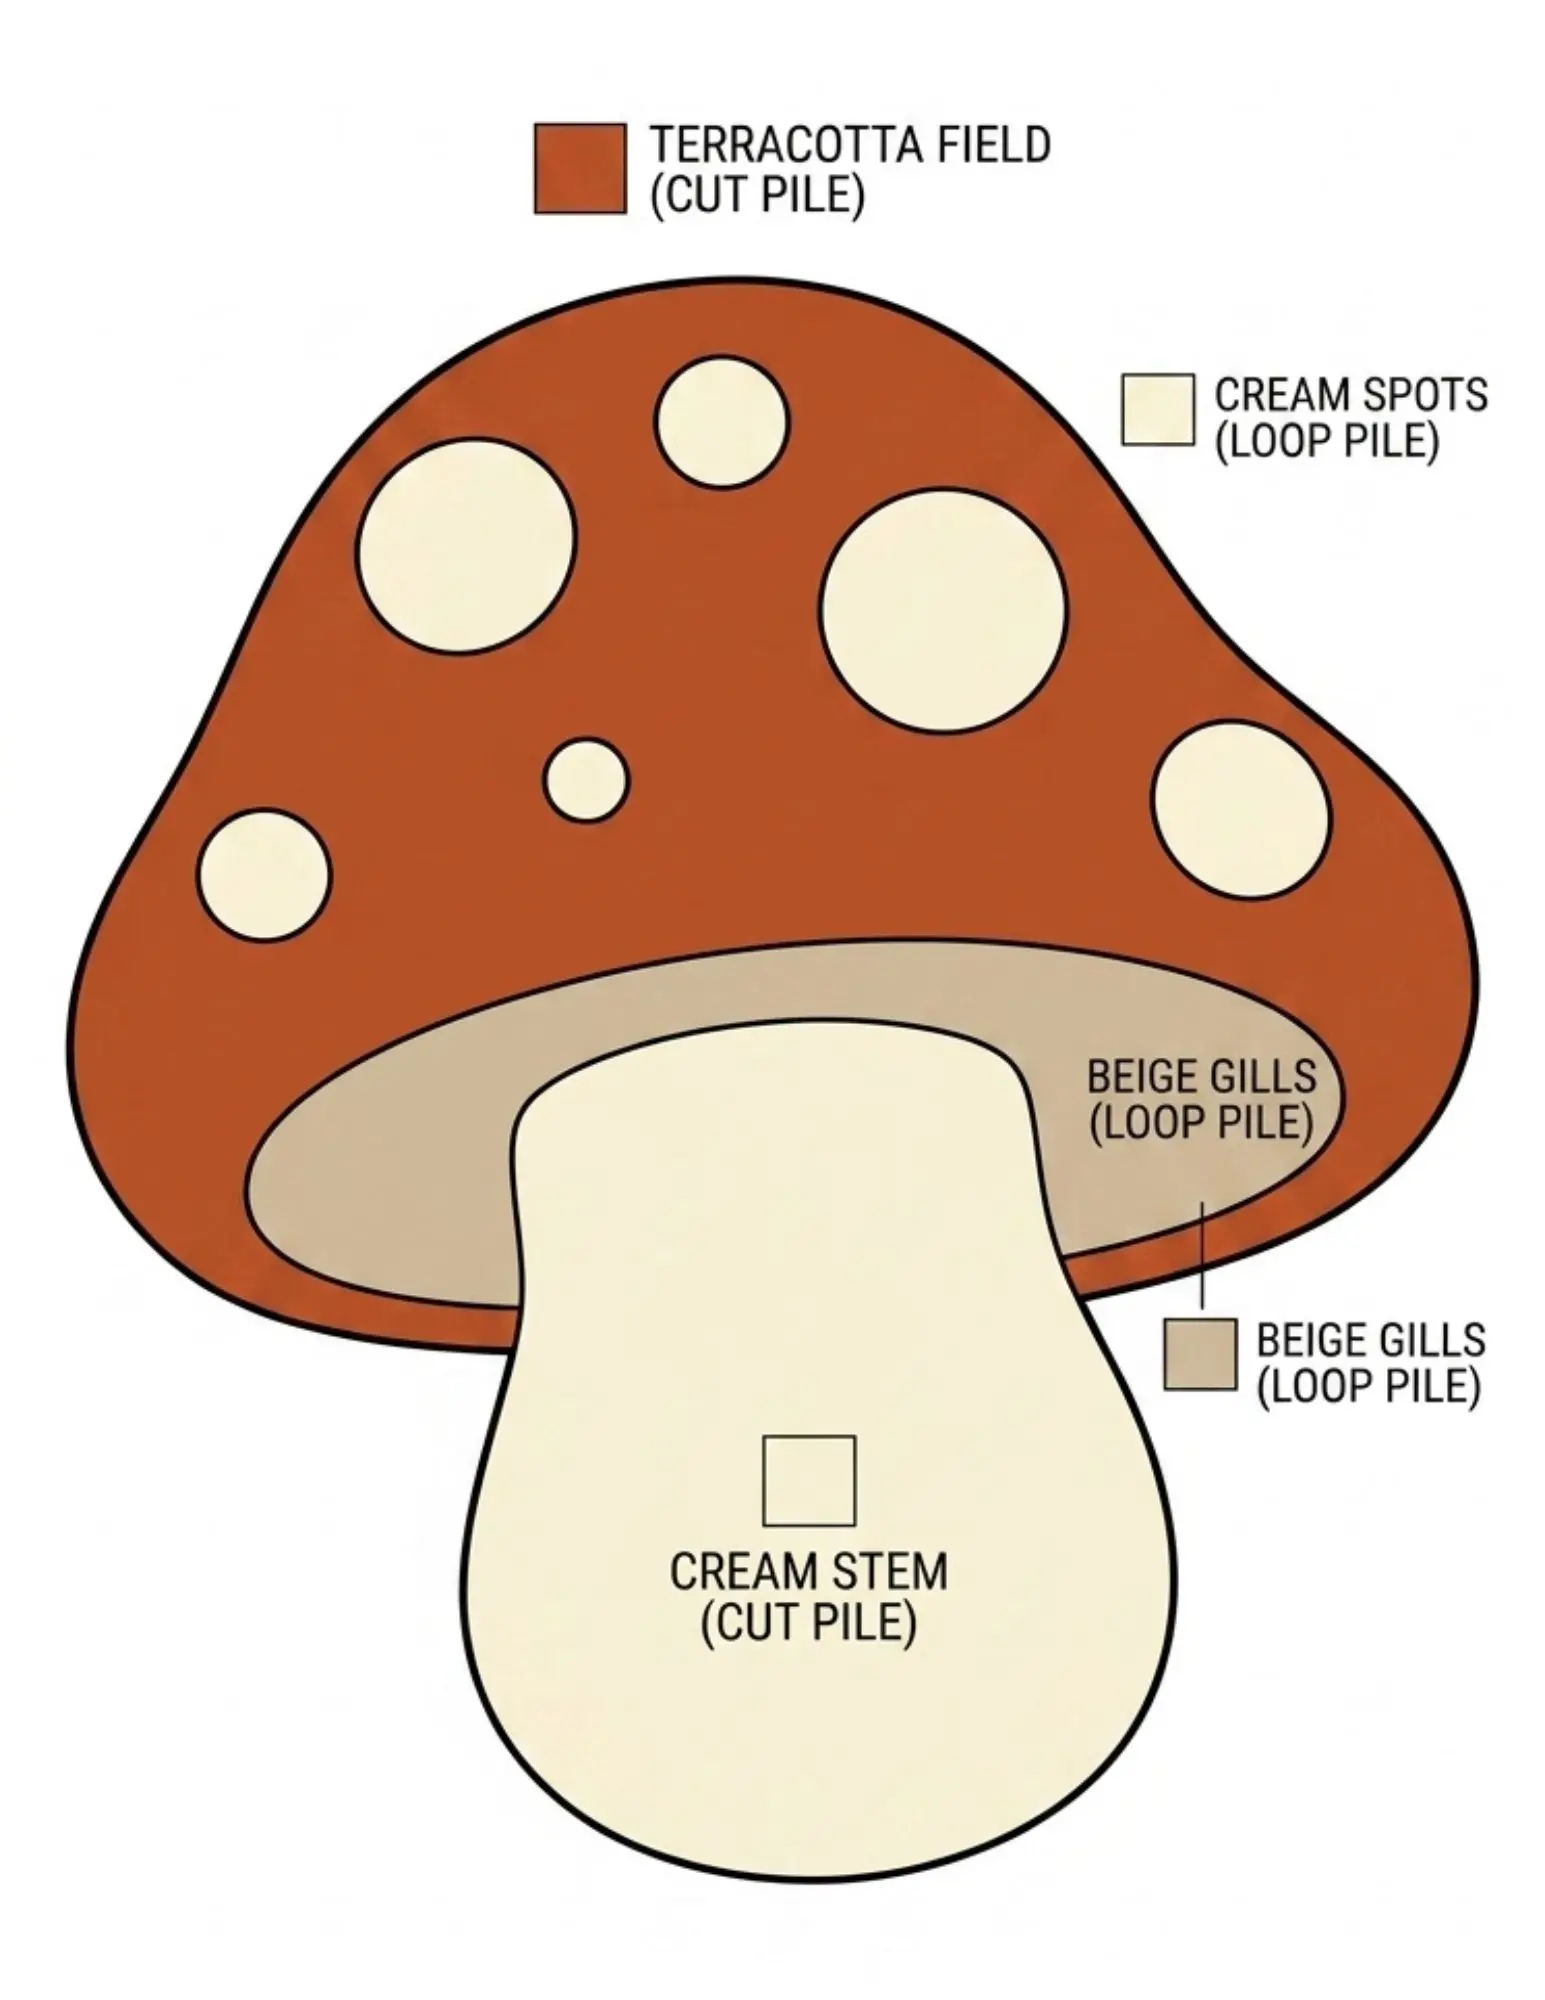
With its soft curves and clean geometric spots, a mushroom rug is a staple fall project. It gives beginners a gentle introduction to tufting curves, switching between colors, and combining different textures.
Pattern Overview & Color Map
- Cap: Terracotta or Rust Red (cut pile).
- Spots: Cream or Off-White (loop or cut pile).
- Gills (Under-cap): Beige or Taupe (loop pile for subtle depth, or cut pile).
- Stem: Cream or Warm Ivory (cut pile).
Yarn & Equipment Setup
- Recommended Yarn: Red Heart Super Saver (Worsted Weight #4 Acrylic).
- Strand Count: Thread 2 strands into your gun at all times to ensure full coverage without jamming the needle.
- Tufting Style: Standard cut pile for the main body. If your gun supports loop pile (or if you have a manual loop tool), using loop pile for the spots and gills adds a gorgeous textured contrast against the plush cut pile cap!
Step-by-Step Tufting Instructions
- Trace the Outline: Project the flat mushroom schematic onto your monks cloth and clearly trace all spots, cap borders, stem, and gill lines.
- Tuft the Smallest Details First: Always tuft small interior shapes before larger backgrounds. Thread two strands of cream yarn and outline and fill the circular spots on the cap.
- Tuft the Gills & Stem: Switch to beige yarn to outline and fill the gill section under the cap. Next, reload with your stem color and fill the main stem area using vertical passes.
- Fill the Cap: Thread your terracotta or rust yarn. Outline the entire outer edge of the mushroom cap and outline around each cream spot. Fill in the remaining cap space with dense, horizontal or vertical lines spaced roughly 0.25 inches (5–6 mm) apart.
- Carve the Details: After gluing and shearing the surface flat, use duckbill scissors angled at 45 degrees to carve a clean ring around each cream spot. This creates crisp, professional spot separation that really pops.
Oak Leaf Tufted Rug (Intermediate-Beginner Instructions)
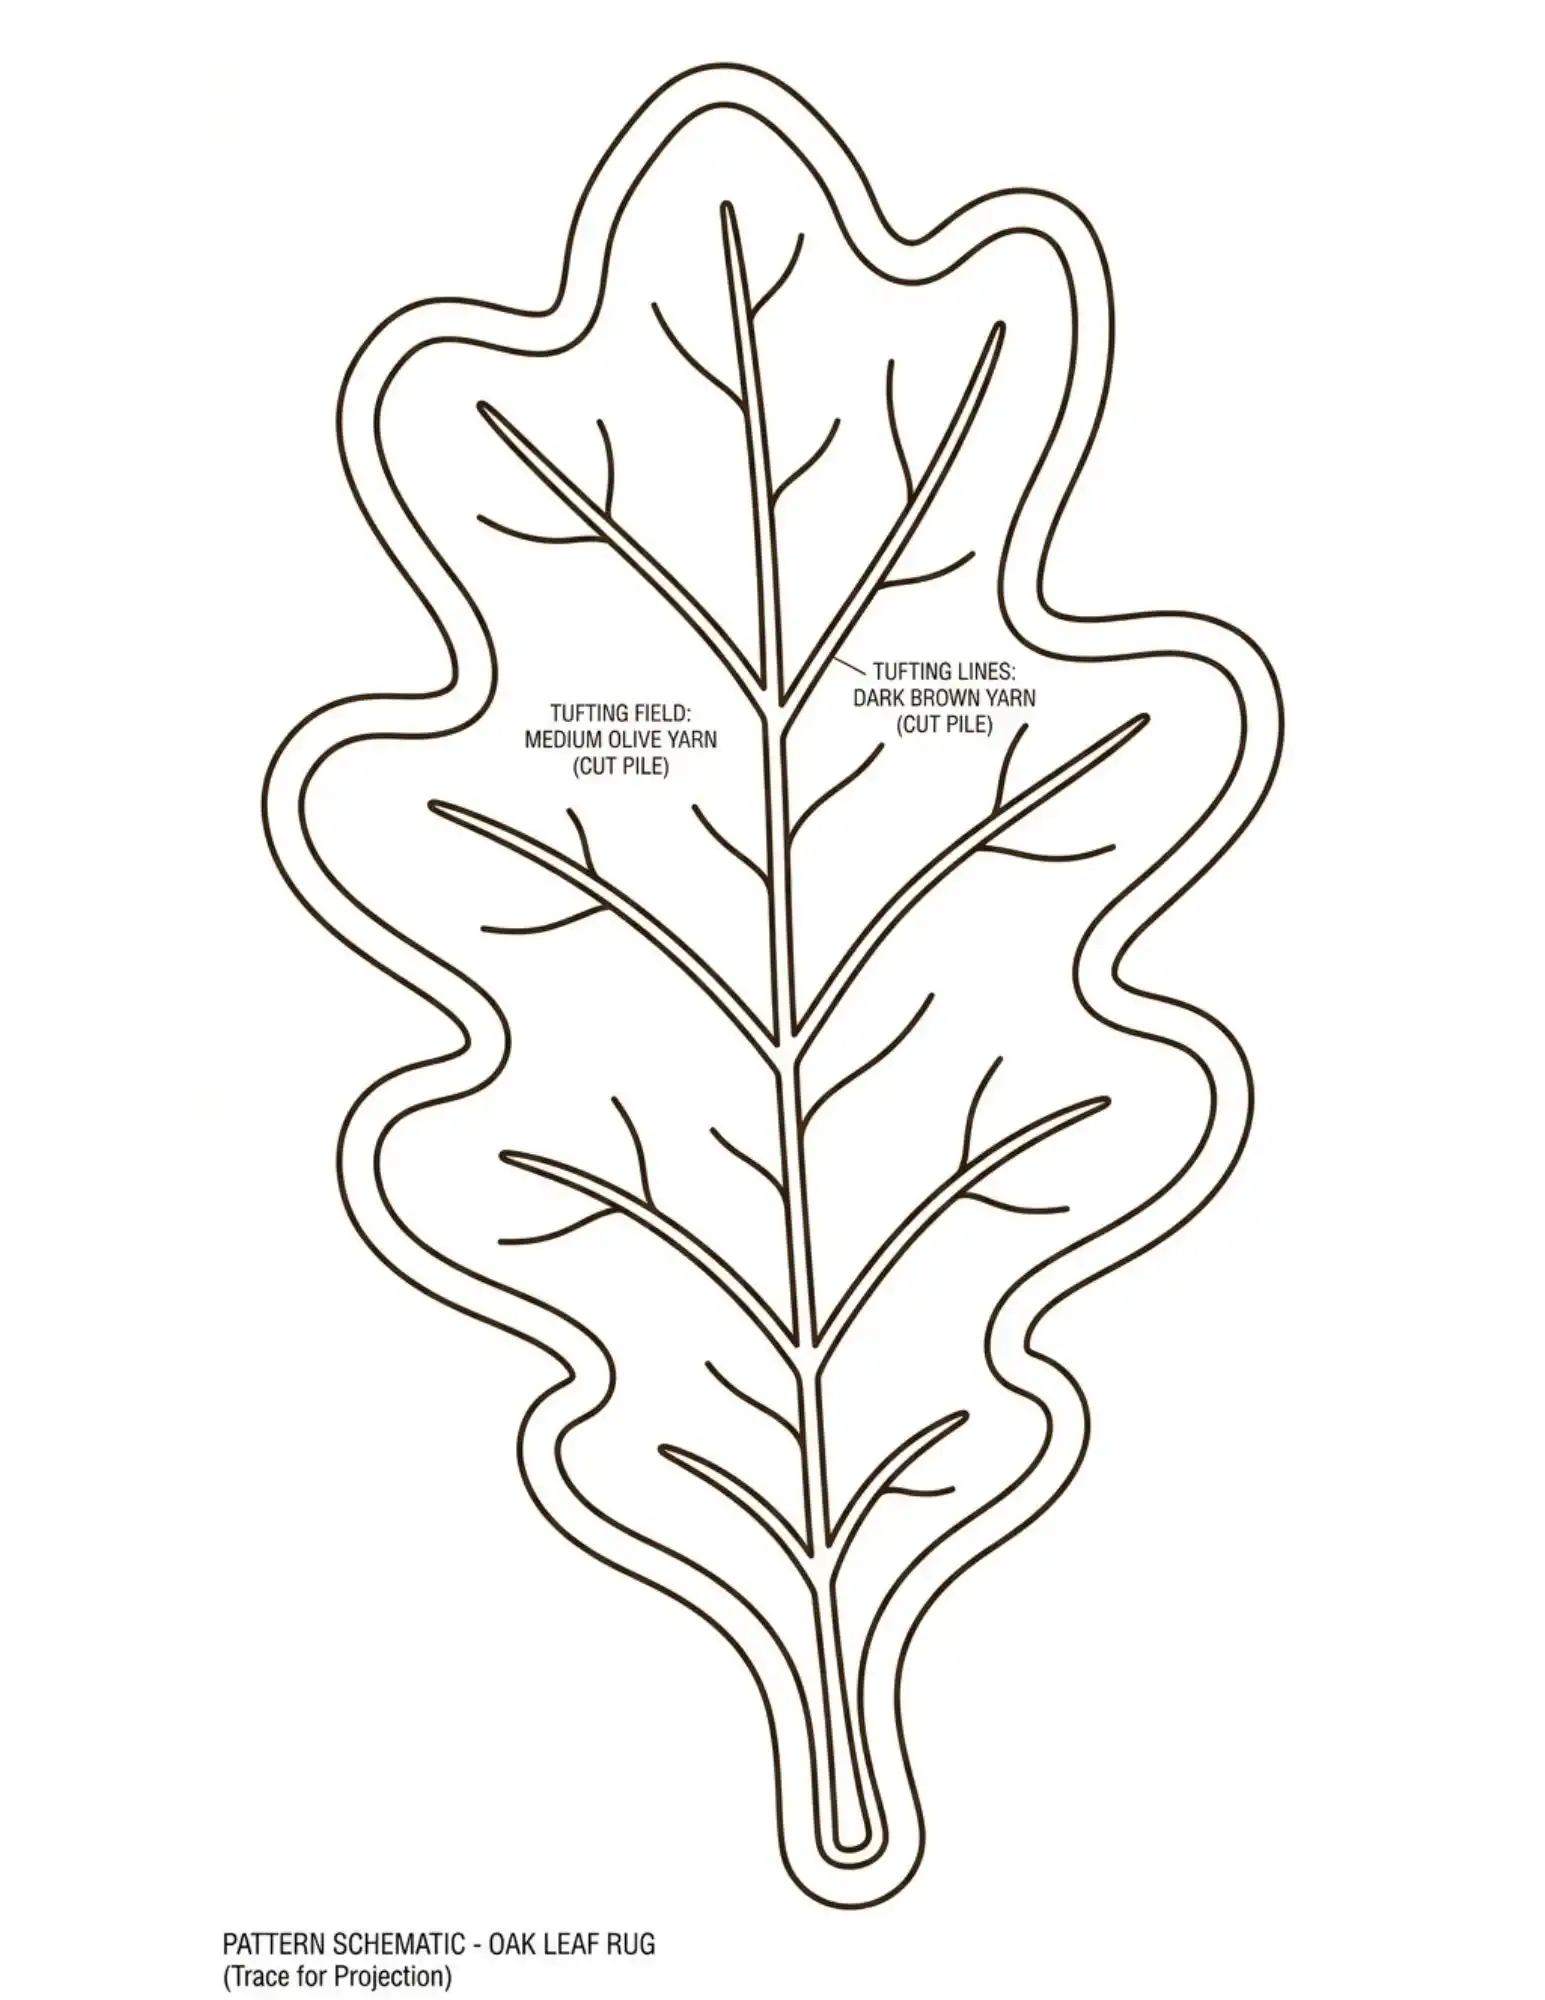
The oak leaf design brings rich organic texture into any space. While it uses the exact same 2-strand technique as the pumpkin, tracing the scalloped outer edge and central vein lines offers a great exercise in rotational gun control.
Pattern Overview & Color Map
- Vein Lines: Dark Brown or Golden Yellow.
- Leaf Body: Medium Olive Green, Mustard Yellow, or Deep Rust.
Yarn & Equipment Setup
- Recommended Yarn: Red Heart Super Saver (Worsted Weight #4 Acrylic).
- Strand Count: Thread 2 strands into your tufting gun for both the veins and the leaf body.
- Tufting Style: Cut pile throughout. Keep your speed on medium-low when navigating the tight turns of the outer leaf lobes.
Step-by-Step Tufting Instructions
- Trace the Outline: Project the oak leaf schematic and trace the outer scalloped edge along with all the branching vein lines.
- Tuft the Veins First: Thread two strands of dark brown yarn. Tuft along the main central vein and branch out into each side vein. Run 2 parallel rows along the main central vein to give it extra weight and visibility.
- Tuft the Outer Boundary: Using the same brown yarn (or your main leaf color), carefully trace around the entire outer scalloped edge of the leaf to lock in the shape.
- Fill the Leaf Sections: Switch to your olive green or leaf color. Tuft along the contours of the leaf, filling in the gaps between the veins. Following the natural curves of the leaf rather than straight up-and-down lines will give the finished pile a natural direction.
- Carve the Vein Grooves: Once off the frame, run your carver or angled duckbill scissors right along the edge of the brown vein lines. Trimming back the olive yarn away from the veins creates a raised 3D leaf structure that looks incredibly high-end.
Gingham / Plaid Check Tufted Rug (Intermediate-Beginner Pattern Instructions)
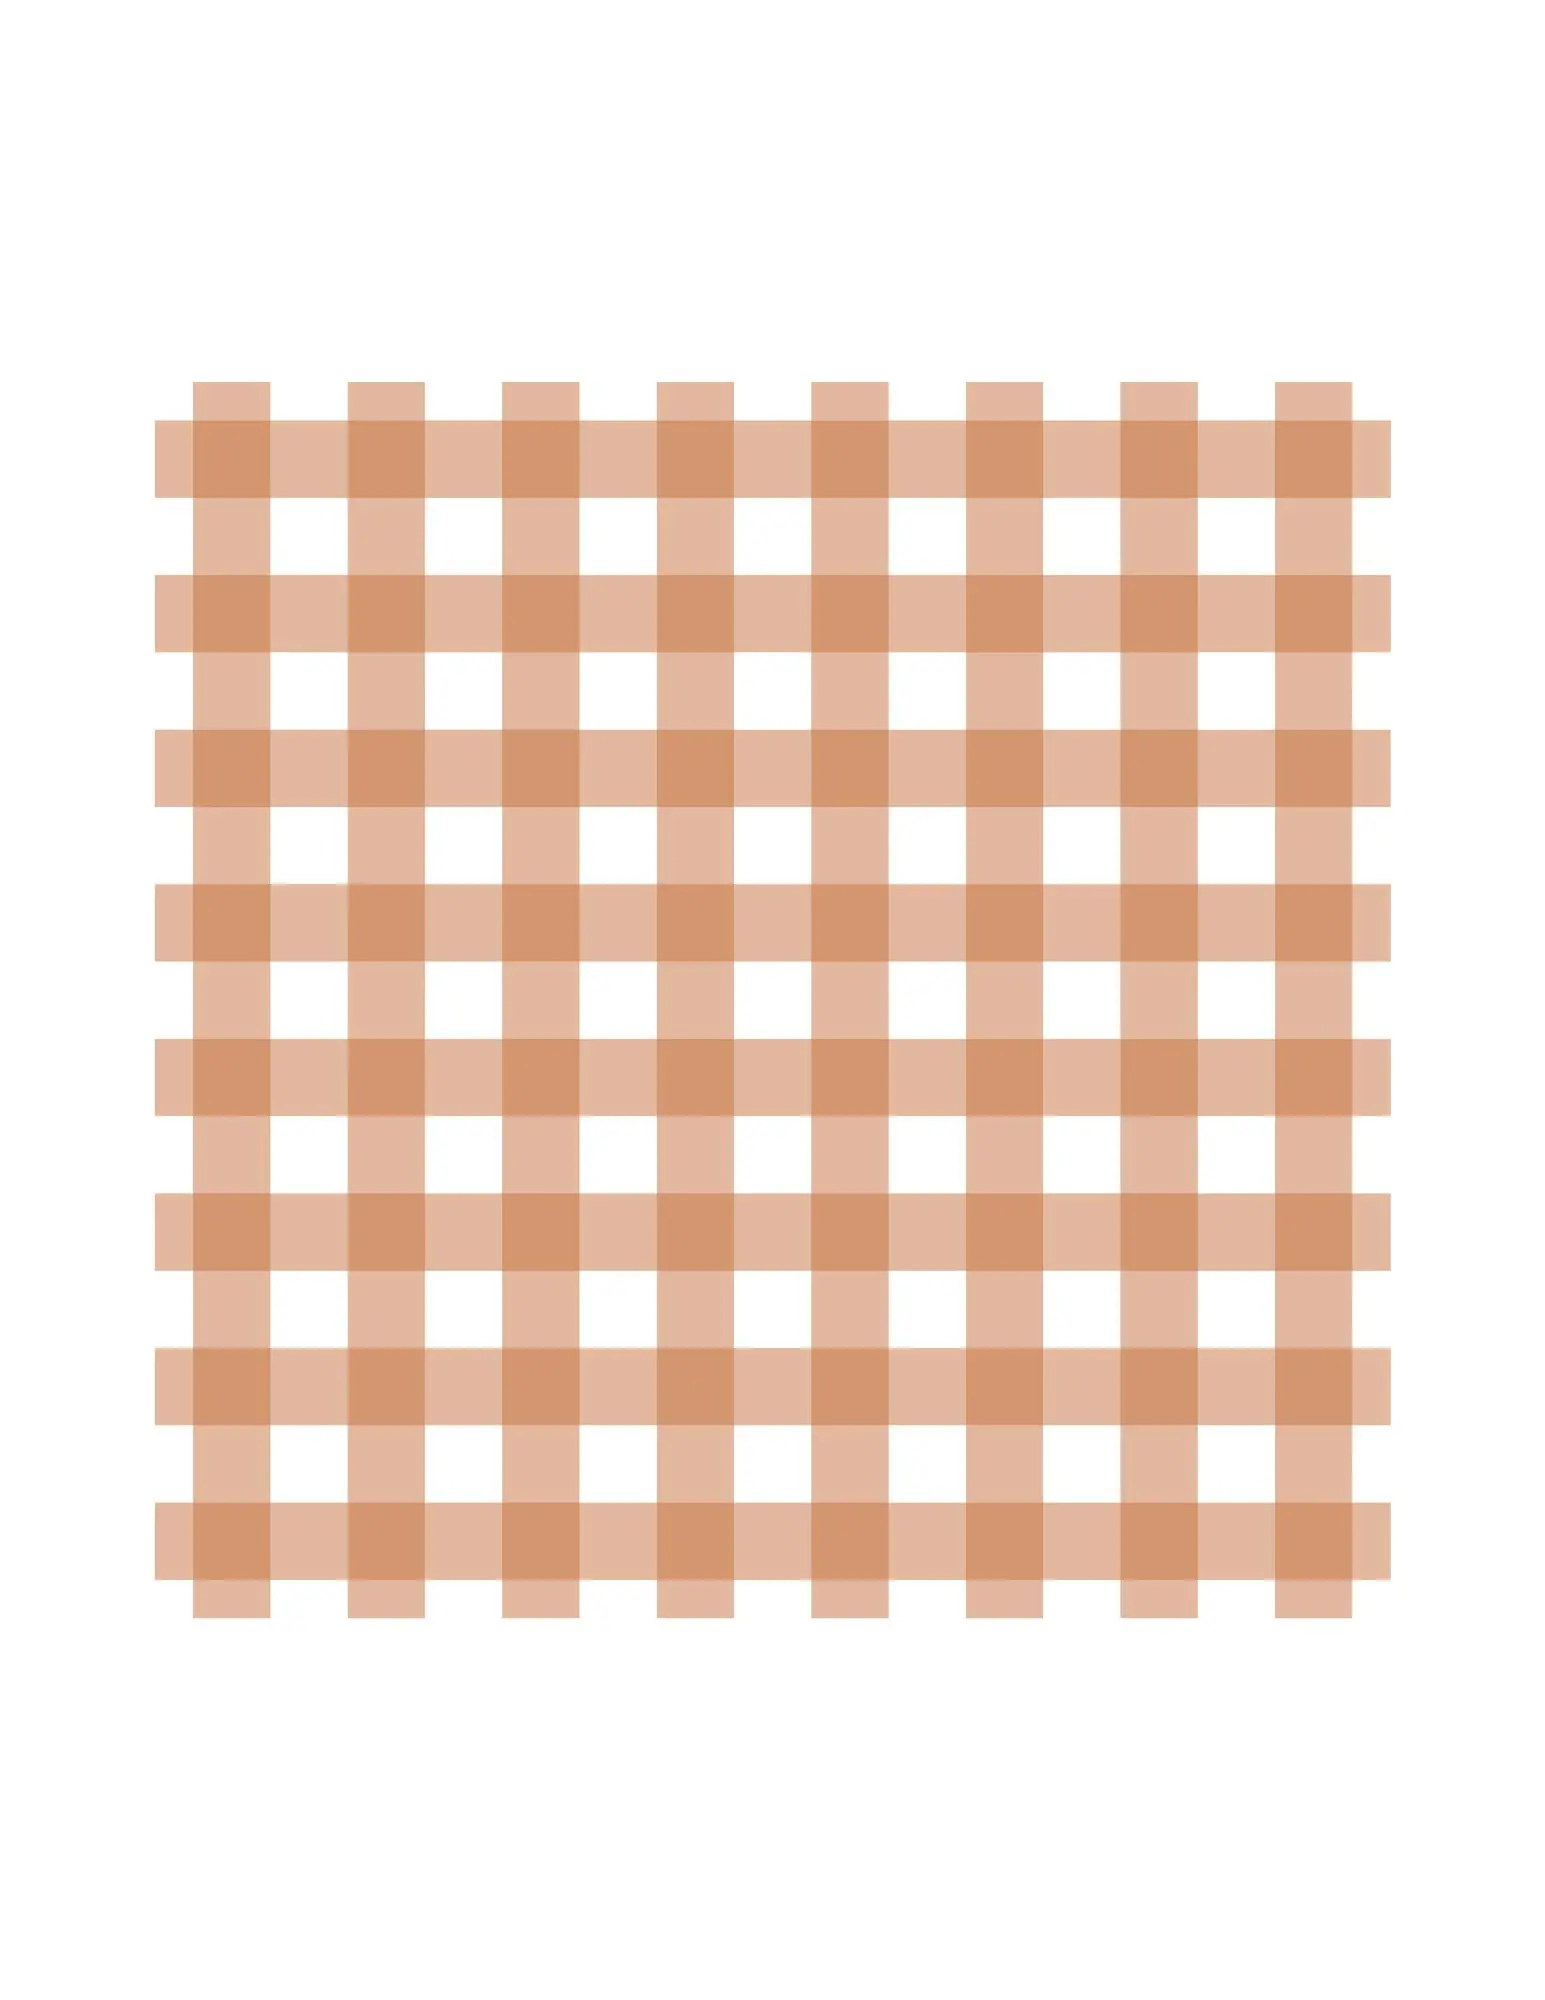
For something more advanced but still approachable, a plaid or gingham check adds a cozy, cabin-style feel to any space. This pattern takes a bit more planning than organic shapes since you are working with precise straight lines and repeating color blocks, making it an ideal step up after you have finished a rounded design or two.
Pattern Overview & Color Map
To create the translucent “overlapping” look of real gingham cloth, you will need 3 colors:
- Base Color: Soft Cream or Off-White (the background squares).
- Medium Tone: Light Terracotta, Soft Peach, or Tan (the horizontal and vertical running stripes).
- Dark Accent Tone: Deep Terracotta or Rust (the intersection squares where the stripes cross over).
Yarn & Equipment Setup
- Recommended Yarn: Red Heart Super Saver (Worsted Weight #4 Acrylic).
- Strand Count: Thread 2 strands into your tufting gun for the entire rug.
- Tufting Style: Cut pile throughout.
- Essential Tool: A long yardstick or metal ruler to keep your grid lines straight on the frame.
Step-by-Step Tufting Instructions
- Trace the Grid: Project the flat gingham schematic onto your stretched cloth. Before tracing with a marker, double-check your horizontal and vertical lines with a level or ruler to ensure the grid doesn’t warp under cloth tension.
- Tuft the Intersections (Darkest Shade) First: Thread two strands of your deep terracotta yarn. Fill in all the small intersection squares throughout the grid first. Keeping your gun moving in clean, vertical passes will help maintain crisp box edges.
- Tuft the Running Stripes (Medium Tone): Switch to your light terracotta/tan yarn. Fill in all the connecting horizontal and vertical bar segments between your dark squares.
- Fill the Background (Base Color): Reload with two strands of cream yarn and fill in all the remaining open background squares. Tuft your lines spaced 0.25 inches (5–6 mm) apart.
- Carve the Grid for Sharp Geometry: Once off the frame, grid patterns need line carving to look sharp. Use your rug carver or duckbill scissors angled at 45 degrees to trim along every single border line where two colors meet. Carving out shallow channels between the squares separates the colors and gives your gingham a crisp, high-end geometric finish!
Yarn Colors for Each Fall Rug Tufting Pattern
Picking the right yarn colors makes a big difference in how clean these fall rug tufting patterns turn out. Here’s what works well for each design using Red Heart Super Saver yarn.
Pumpkin Tuft:
- Outer Segments: Red Heart Super Saver, Carrot
- Inner Segments: Red Heart Super Saver, Pumpkin & Saffron
- Stem: Red Heart Super Saver, Cafe Latte or Tea Leaf
Oak Leaf Tuft:
- Leaf Body: Red Heart Super Saver, Olive or Carrot
- Vein Detail: Red Heart Super Saver, Cafe Latte or Saffron
Mushroom Tuft:
- Cap: Red Heart Super Saver, Carrot or Terracotta
- Stem & Spots: Red Heart Super Saver, Buff
- Gills: Red Heart Super Saver, Cafe Latte
Plaid/Gingham Check:
- Base Squares: Red Heart Super Saver, Buff
- Running Stripes: Red Heart Super Saver, Peach
- Intersections: Red Heart Super Saver, Carrot
Materials You’ll Need
- Tufting frame (beginner-friendly options linked below)
- Yarn in your chosen fall palette
- Tufting gun
- Backing fabric
- Fabric marker for your pattern outline
Ready for More Patterns?
These four designs are just the start. If you want the full pattern library with 15 designs across four skill levels, grab the 3 Easy Beginner Rug Tufting Patterns (Free Printable PDF Download) and start planning your next project today.