
Your tufting gun gets all the credit, but having the right rug shearing tool is what actually turns a tufted piece into a finished rug. I’ve watched plenty of beginners (myself included, early on) put hours into a beautiful tufted design only to rush the finishing, and end up with a piece that looks homemade in the wrong way: fuzzy lines, an uneven surface, edges that fray within a month.
This is the full tool list I’d actually put together if you asked me what to buy, in the order you’ll use it.

Why Bother With Proper Finishing At All
Two things happen in these final steps, and they do different jobs.
Shearing levels your pile, loops or cut yarn, so the design actually reads clearly instead of looking like a blur of color. If you’ve ever seen a tufted rug where the pattern looks “smudged,” that’s almost always a shearing problem, not a tufting one.
Finishing is what keeps the rug alive. Glue and backing fabric lock the yarn in permanently. Skip this step or rush it, and you’ll be vacuuming up loose fibers for the life of the rug, which, at that point, won’t be very long.
| Process | Purpose | Result |
|---|---|---|
| Shearing | Levels loops or cut pile | Clean lines, even surface |
| Sculpting | Carves depth between colors | 3D texture |
| Backing | Locks yarn with adhesive | Durability, no shedding |
Rug Shearing Tools You’ll actually Use
Handheld curved shaver
This is the cheapest tool on this list and the one I’d buy first. As soon as your rug is backed, go over the whole thing with this, multiple passes, spinning the rug so you’re working in different directions each time. It pulls up loose yarn that didn’t glue down quite right, and the fluffier bits that haven’t found their place yet. It won’t replace anything else here, but it makes everything after it easier.
This one’s sold as a carpet pile brush with a double-sided metal scraper, it’s marketed mostly for pet hair, but the wooden handle and scraper edge are exactly what you want for pulling loose yarn off a freshly backed rug.
Carpet/sheep shears
These started life as actual sheep-shearing tools, and tufters adopted them because the wide blade covers ground fast. This is your workhorse for leveling large areas, not your detail tool.
A genuine safety note, not a throwaway one: these blades are sharp enough to do real damage. Keep your fingers clear while you work, and keep them stored somewhere a curious kid can’t get to them.
Tweezers and a flathead screwdriver
Not tools you’ll find on most tufting lists, but both genuinely earn a spot in your kit. Where two yarn colors meet, they tend to overlap slightly instead of forming a clean line. Work a screwdriver into the small gap where the colors meet and run it along the seam, you’re not stabbing at the rug, just gently separating the strands so each color sits where it belongs. Tweezers do the same job for the stray fibers the screwdriver leaves behind. Neither costs more than a few dollars, and you probably already own both.
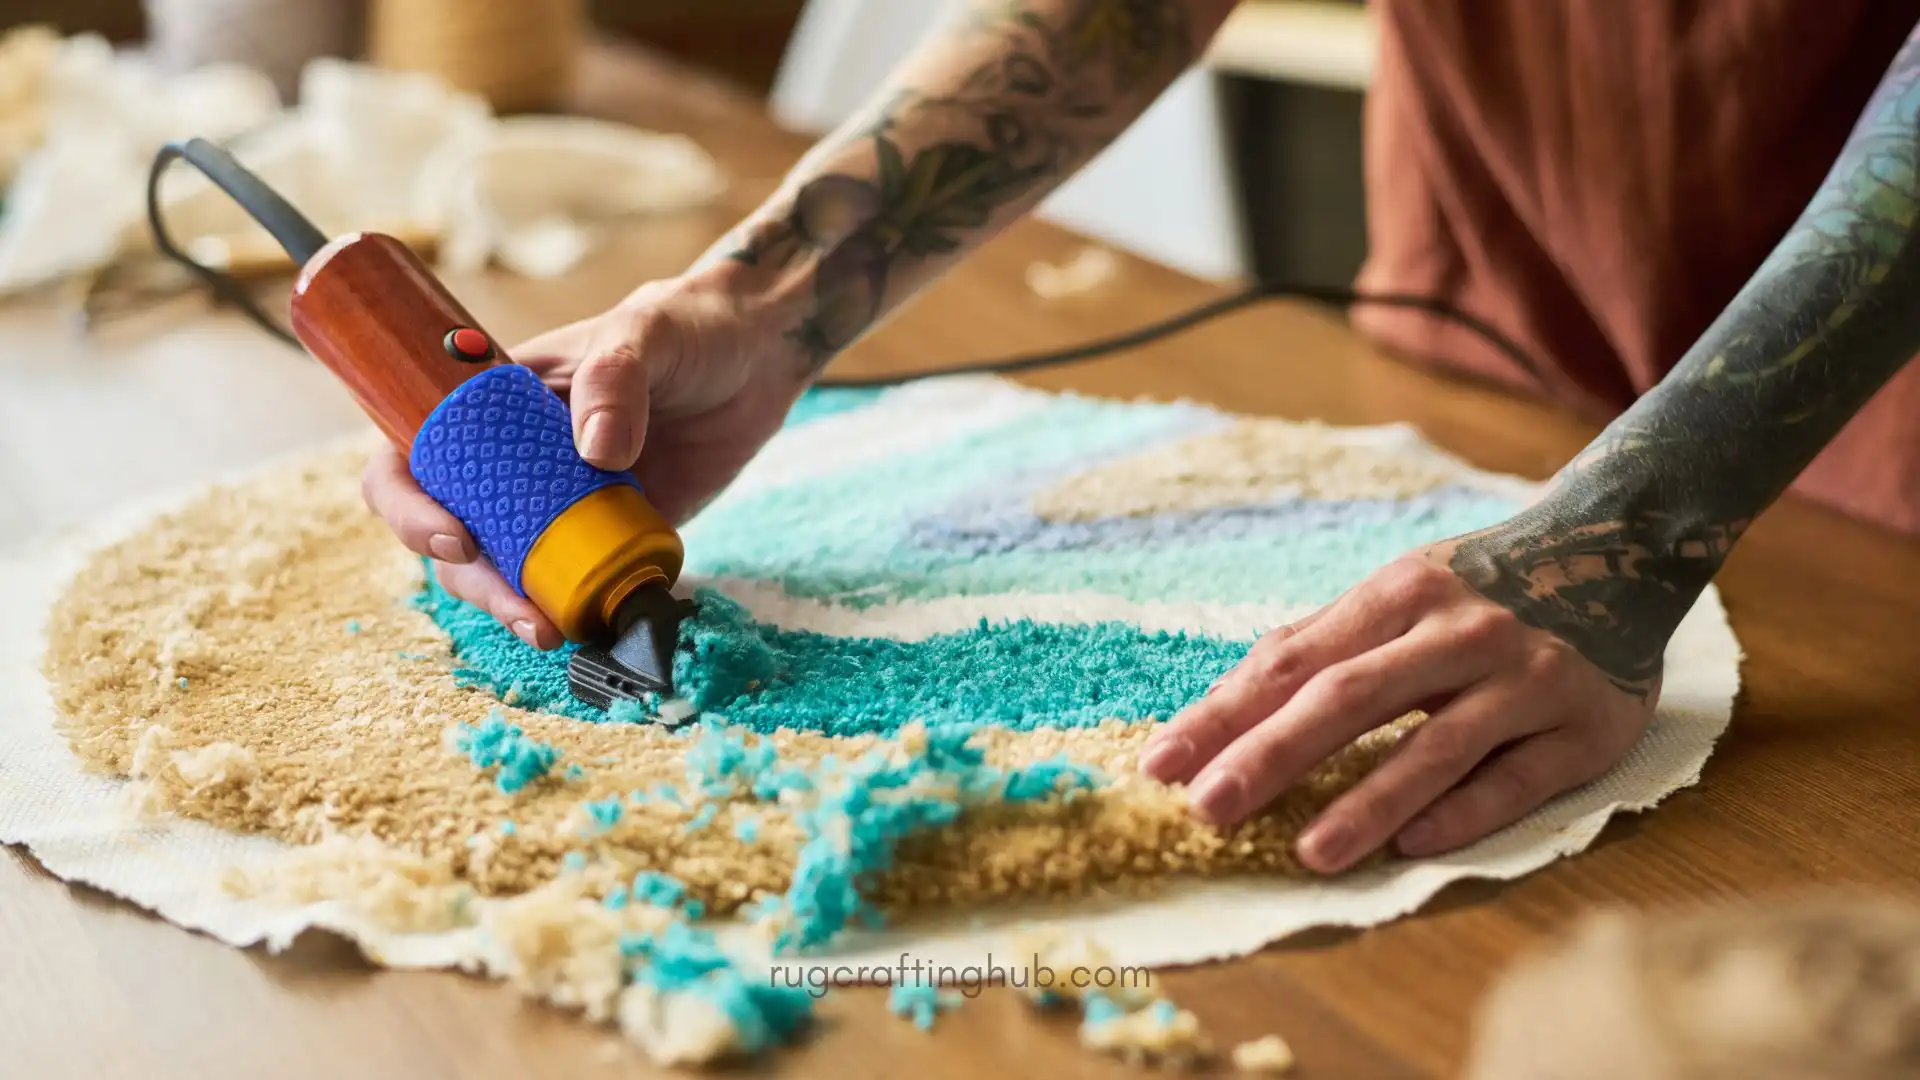
Carving clippers
This is how you get those crisp grooves between color blocks. Smaller, more maneuverable than sheep shears, and this is the tool that turns a flat color-block rug into one with real dimension. If you’re only going to buy one electric tool beyond the basics, this is the one I’d pick.
The trick with two-tone lines: angle the clippers so the point follows whichever color you’re actually trying to carve. Carving the white line, angle into the white. Carving the black, angle into the black. It feels backwards at first, most beginners want to hold clippers like scissors, and it takes a few rugs to get the motion comfortable.
Get a kit that includes a shearing guide rather than buying the two separately, it’s an acrylic platform that clips onto the clippers and keeps them riding flat against the rug surface, which means no accidental divots (“potholes,” if you’ve seen the term) from uneven pressure. Cheap insurance against ruining hours of work in one careless pass, and most decent carving kits bundle it in already.
Duckbill scissors + tailoring scissors
Duckbill scissors have a flat “bill” under the blade specifically so you can’t gouge your primary backing while trimming close to the surface, worth owning a pair even if you do most of your work with electric tools, because you’ll always need a manual option for tight spots. A decent pair of 10″ tailoring scissors covers everything else: trimming backing fabric, cutting yarn, general cleanup.
Finishing: Backing and Edges
Shearing makes it look good. This part makes it last.
| Tool | Purpose | Notes |
|---|---|---|
| Tufting glue | Bonds yarn to backing | Don’t substitute craft glue, it cracks and peels |
| Finishing fabric | Covers the back | Cleaner look, prevents slipping on floors |
| Rug shaver | Removes lint/micro-fibers | Final pass for that velvet feel |
| Vacuum | Pulls loose fiber out | Plan on several passes, not one |
For glue, I use Roberts 3095 Carpet Adhesive, a flexible, latex-based adhesive that locks yarn in place without drying brittle, which matters if you want the rug to keep some give after curing rather than going stiff. View it on Amazon, or read my full guide to choosing tufting glue if you want the longer breakdown, curing times, the hybrid hot-glue-plus-spray-adhesive method, how to avoid curling edges.
The Order I’d Do This In
- Glue (On Frame): Apply adhesive while the rug is still under tension. Let it cure for 48–72 hours.
- Cut Down: Once fully cured, remove the rug from the frame.
- Backing: Attach your backing fabric now that the rug is off the frame.
- Clean the pile: Go over the rug with the handheld shaver to pull up loose fibers.
- Rough shear: Use sheep shears to level the pile.
- Separate and Carve: Use your screwdriver/tweezers and carving clippers to define your lines.
- Final trim and detail: Use duckbill scissors and a final vacuum pass to finish the edges.
Where This Goes Wrong
Holes in the pile. Almost always a blade angle problem, you’re tilting too steep instead of keeping the shears flat. Let the blade glide, don’t dig. This is also exactly what a shearing guide is for: tufter Rhody has talked about ruining two rugs early in his career by working carving shears freehand without one, digging too deep into the pile. A guide isn’t a beginner crutch, it’s what keeps a careless half-second from costing you a finished rug.
Uneven height. This is a pressure issue, not a tool issue. Let the shears’ own weight do the cutting instead of pushing down. The shearing guide solves this for you if you’re still building the feel for it.
Backing that won’t stay put. Wrong glue, or not enough dry time. Twenty-four hours isn’t a suggestion.

Ready To Upgrade Your Rug Shearing Tool?
Everything above will get you a genuinely professional-looking rug. But once you’re tufting regularly, you’ll start noticing the difference that purpose-built, higher-grade tools make, blade durability, how true the cut stays over time, and how consistent your pile height ends up without fighting the tool for it.
When I’m ready to invest beyond a starter setup, All Things EFFY is where I look, a US-based rug tufting supplier, not just a reseller of generic tools.
My pick for this tier is their Rosewood Carving Tool, a 200W electric carver with adjustable speed (2000–6000 RPM) and an actual rosewood handle instead of plastic, it’s noticeably more comfortable through a long carving session. Get it bundled with their EasyClip Carving Guide ($150) rather than on its own, so you’re not hunting down a separate guide afterward.
One thing to know before you order: items like this ship factory-direct, which means 11–15 business days rather than next-day Amazon shipping. Worth planning around if you’ve got a rug deadline.
This isn’t a “you need this” upgrade, it’s a “once the hobby-grade tools start frustrating you, here’s where to look next” one.
Before You Shear Your First Rug
If you haven’t locked down your tufting fundamentals yet, start here: Beginner’s Guide to Rug Tufting. Shearing is unforgiving of shortcuts taken earlier in the process.
If you want more structured, hands-on instruction than a blog post can give you, Trish Andersen’s tufting course on Domestika walks through her full process, including finishing and care, and is worth a look if you’re still building confidence with the fundamentals.
Already finished this rug and starting your next one? My full tufting supplies Idea List covers everything upstream of this post, gun, frame, primary cloth, yarn, so you’re stocked up before you even get to the shearing stage.
