
If you are looking for free geometric tufting patterns for beginners, this guide includes simple, beginner-friendly designs you can trace, scale, and tuft right away.
These easy geometric tufting patterns are ideal for tufting because they use clean shapes, repeated layouts, and clear outlines, making them easier to control with a tufting gun.
👉 Start with the full beginner pattern guide here →
Quick Start: Easy Geometric Tufting Patterns for Beginners
If you want to start immediately, these are the easiest geometric designs to try:
- Checkerboard pattern → best for straight lines
- Diamond grid pattern → builds spacing and alignment accuracy
- Split arch pattern → helps practice smooth curves and clean sections
- Wavy line pattern → combines flow and repetition
- Diagonal stripe pattern → improves directional control and consistency
These patterns are beginner-safe and work well on 24×24 tufting frames.
Want more beginner-friendly designs?
👉 Browse the free beginner pattern collection →
What Are Geometric Tufting Patterns?
Geometric tufting patterns are rug designs made using basic shapes like squares, circles, triangles, and lines arranged in repeating or structured layouts.
They are easier than detailed illustrations because:
- lines are predictable
- shapes are easy to trace
- designs can be scaled without distortion
Why Geometric Patterns Are Perfect for Beginners
The best beginner tufting patterns are geometric because they:
- use bold, easy-to-follow outlines
- require fewer color changes
- reduce mistakes during tufting
- help build control with the tufting gun
Most beginner-friendly designs are scaled for 2ft x 2ft (24×24) frames, allowing faster completion and lower yarn costs.
See my recommended beginner tufting frames on Amazon →
Simple Geometric Rug Pattern Ideas
These simple geometric rug pattern ideas are designed for beginners and can be easily scaled for different rug sizes.
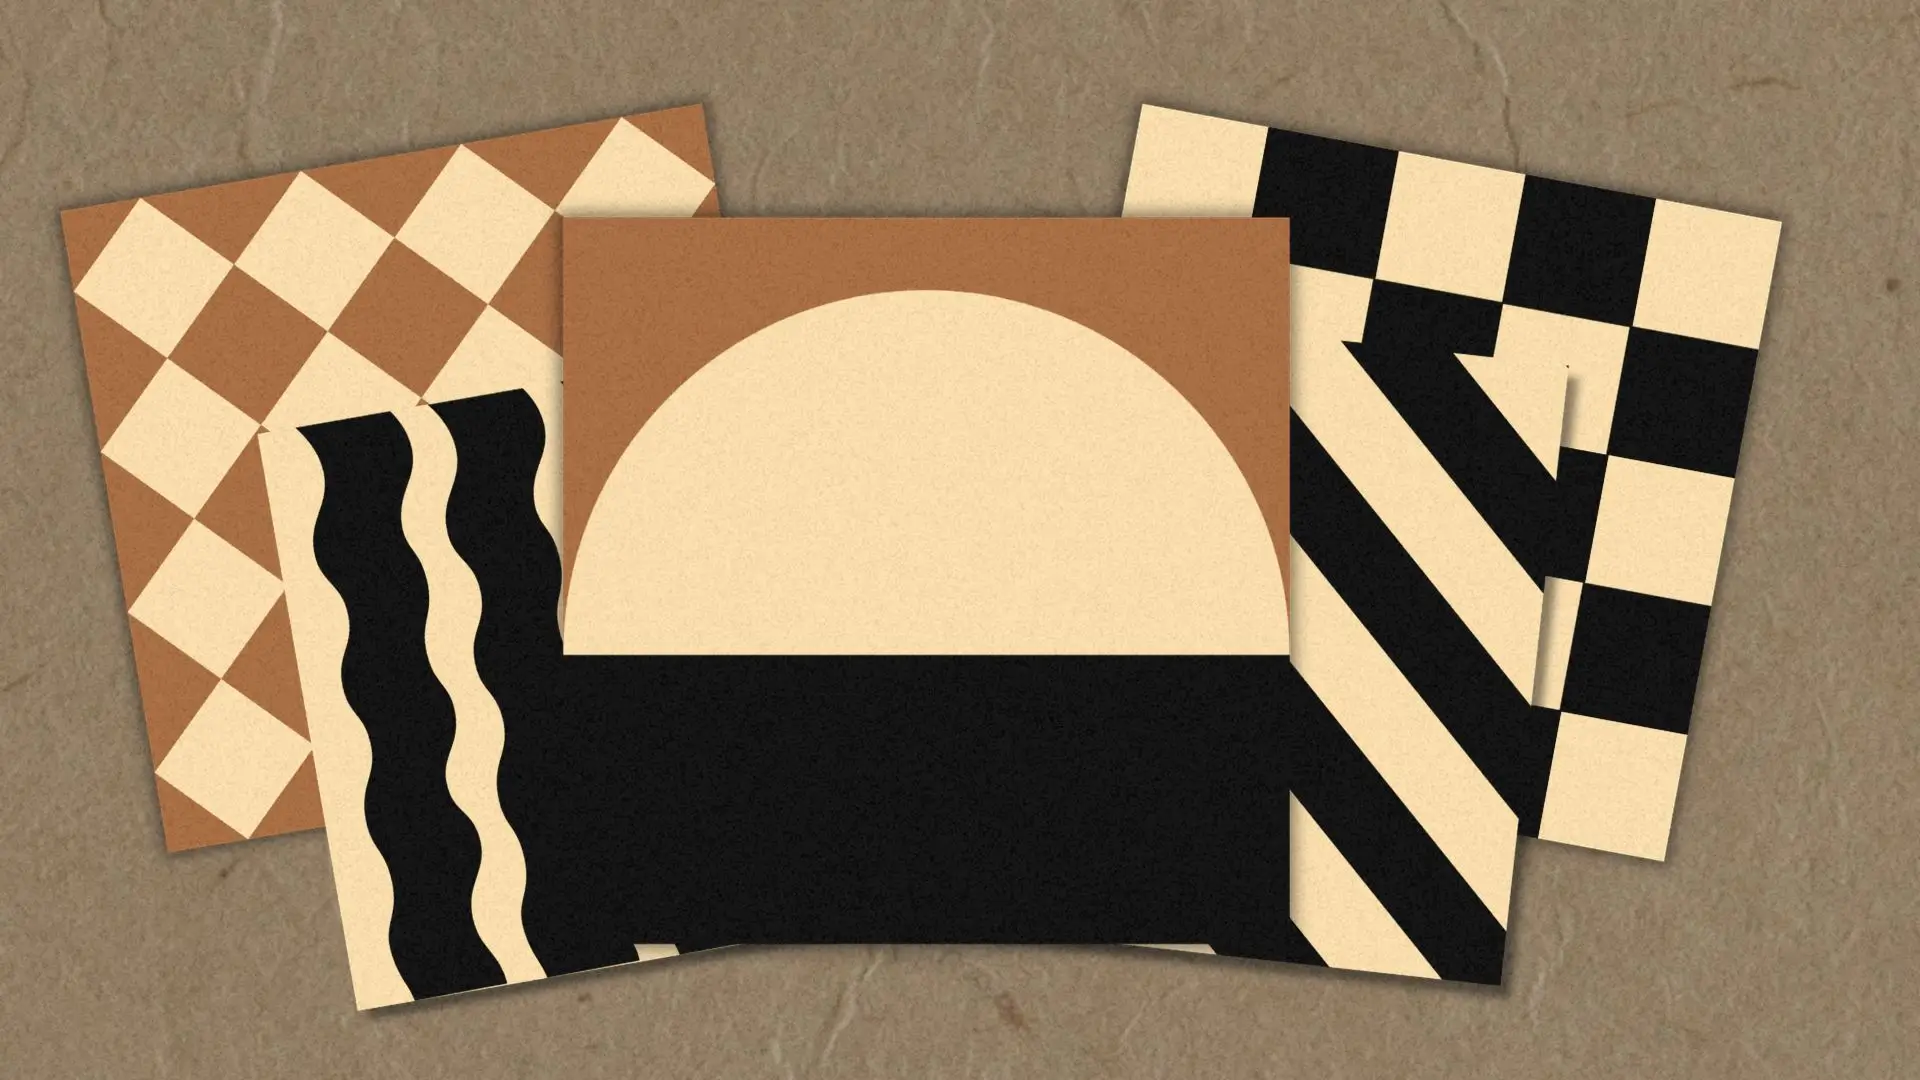
1. Checkerboard Pattern

Difficulty: Very Beginner
The checkerboard pattern is one of the easiest geometric tufting patterns for beginners because it uses simple, evenly spaced squares.
- helps you practice straight lines and consistent spacing
- easy to measure and scale for different rug sizes
- works well with high-contrast color combinations
To create this pattern, divide your surface into a grid and alternate two colors evenly across the design. This pattern is ideal for beginners working on their first 24×24 tufting frame.
2. Diamond Grid Pattern

Difficulty: Beginner
The diamond grid pattern is a rotated version of a square grid, creating a more dynamic geometric look while still being beginner-friendly.
- improves alignment and spacing accuracy
- introduces angled shapes without adding complexity
- works well with two-tone color schemes
This pattern is created by rotating a square grid at a 45-degree angle. It’s a great next step after mastering checkerboard layouts.
3. Split Arch Pattern

Difficulty: Beginner
This pattern is typically built using a half-circle or arch shape divided into two or three sections. It works well for bold, simple rugs with a clean finish.
- helps develop smooth curve control
- uses large, easy-to-fill sections
- creates a modern, minimal rug design
4. Wavy Line Pattern

Difficulty: Advanced Beginner
The wavy line pattern introduces movement while still keeping the design simple and repeatable.
- helps practice consistent curved lines
- easier than complex organic shapes
- creates a flowing, modern look
This pattern is made by repeating soft wave lines across the surface. Keep spacing consistent to maintain a clean and balanced design.
5. Diagonal Stripe Pattern

Difficulty: Beginner
The diagonal stripe pattern is a simple geometric design that adds direction and visual flow to your rug.
- improves control when working at angles
- easy to repeat across the entire surface
- works well for bold, high-contrast designs
To create this pattern, use evenly spaced diagonal lines across your surface, typically at a 45-degree angle. This design is beginner-friendly and produces a clean, structured result.
These geometric tufting patterns for beginners are designed to help you build control, improve consistency, and complete your first rugs with clean, professional-looking results.
👉 Want more beginner-friendly patterns?
See the beginner tufting patterns collection here →
How to Create Your Own Geometric Tufting Pattern
You can easily turn your geometric rug design ideas into your own patterns using simple tools.
Step-by-step:
- Choose a base shape (square, circle, triangle)
- Draw a grid on paper or digitally
- Repeat the shape across the layout
- Simplify the design into clear sections
- Transfer to backing fabric using a projector or marker
Keep shapes large and avoid small details for best results.
New to tufting completely?
👉 Read the beginner’s guide →
Suggested Tufting Order for Geometric Patterns
One of the most common beginner questions is where to start when tufting a pattern.
For geometric designs, the process is simple and consistent.
Best order to tuft geometric rugs:
- Outline the full design first
- Trace all main shapes and borders
- This keeps edges clean and prevents shapes from blending together
- Fill the largest sections next
- Work from the center or biggest shapes outward
- This helps maintain balance and reduces mistakes
- Complete smaller sections after
- Fill in secondary shapes and color blocks
- Follow the outlines you created earlier
- Finish with details and corrections
- Clean edges
- Fix uneven lines
- Adjust small areas
Once you understand the basics, you can apply this method to more advanced designs.
👉 See additional beginner patterns here →
Example: Checkerboard or Diamond Pattern
- Outline the full grid first
- Fill one square or section at a time
- Keep edges clean before moving to the next section
Beginner Tip
Avoid starting with small details or complex shapes.
Geometric rugs look best when lines are clean and sections are filled evenly.
Common Mistakes to Avoid
Avoid these beginner errors:
- making shapes too small
- using too many colors
- adding unnecessary detail
- choosing complex curves too early
Simple designs produce better finished rugs.
Download Free Geometric Tufting Patterns PDF
If you want ready-to-use templates:
👉 Download the free pattern kit here →
Includes:
- beginner geometric designs
- advanced pattern variations
- printable templates
- step-by-step tufting order
FAQ
Checkerboard, circles, and simple grids are the easiest because they use straight lines and basic shapes.
Use a ruler or grid to sketch repeating shapes, then trace onto your backing fabric.
Most beginner rugs are 24×24 inches, which balances size, cost, and completion time.
Yes. You can draw patterns manually using a ruler, compass, or printed template.
Ready to start tufting your first rug?
👉 See the beginner tools and setup guide →
