


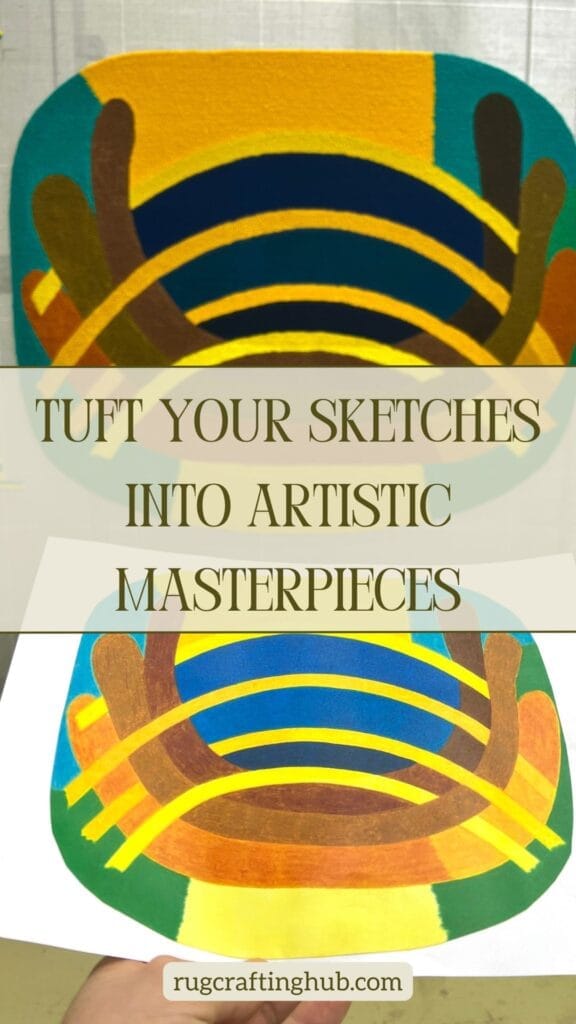
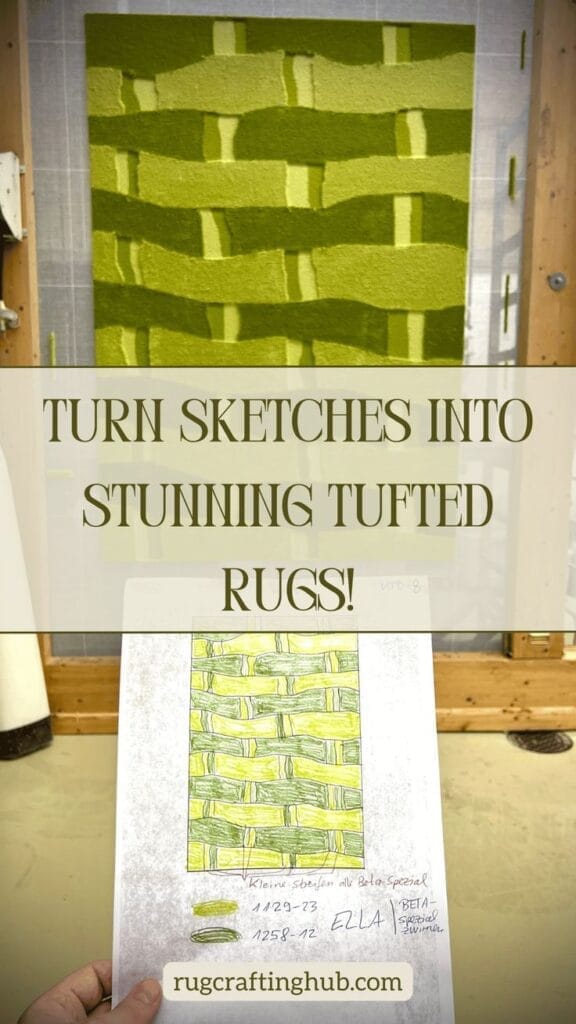
Have you ever sketched a design and thought, “This would make an amazing rug!”? With the Kramis Tufting Tutorial Series, you can turn your sketches into stunning, tactile masterpieces. This guide aligns with the series’ step-by-step lessons, from stretching the fabric to adding the final touches. Whether you’re a beginner or a seasoned crafter, you’ll learn how to master design transfer for rug tufting and create rugs like a pro. Let’s dive in!
Chapter 1: Preparation
Lesson 1: Stretching the Base Fabric
Every great rug starts with a solid foundation. Stretch your primary tufting cloth tightly over a sturdy frame and secure it with staples or tacks. A taut cloth ensures smooth tufting and prevents uneven loops.
Pro Tip: Use a professional-grade frame (like this one) for the best results.
Lesson 2: Project & Draw Motif
Now it’s time to transfer your sketch onto the cloth. Use a mini projector (this affordable option) to project your design onto the fabric. Important Note: The image will be flipped when projected, so mirror your design digitally before tracing. Use a washable marker (like this one) to outline your motif.
Pro Tip: Watch Lesson 2 of the Kramis series to see how Swiss artisans project and draw motifs with precision.
Lesson 3: Preparation Before Tufting
Before you start tufting, gather all your tools:
- Tufting Gun: Choose a cut pile, loop pile, or 2-in-1 gun.
- Yarn: Acrylic or wool blends work best for beginners.
- Scissors and Trimming Tools: For cleaning up your design.
Pro Tip: Organize your workspace and test your tufting gun on a scrap piece of cloth to ensure smooth operation.
Further reading: Top-of-the-Line Tufting Machines: AK-I, AK-Duo, AK-V, and ZQ-II
Chapter 2: Tufting
Lesson 4: The Basics of Tufting
Load your tufting gun with yarn and practice the basics:
- Hold the gun at a 90-degree angle to the cloth.
- Move steadily to create even loops or piles.
- Work in small sections and step back occasionally to check your progress.
Pro Tip: Watch Lesson 4 of the Kramis series to master the fundamentals of tufting.
Lesson 5: Tufting the Rug
Follow the outlines of your design and start tufting! Begin with the larger sections, then fill in the details. Take your time and enjoy the process.
Pro Tip: If you’re new to tufting, practice on a scrap piece of cloth to get comfortable with the gun’s speed and pressure.
Lesson 6: Fine Tuning Before Glueing
Once your design is complete, use sharp scissors or a pile height trimmer (this one is highly recommended) to even out the pile and add definition to your design.
Pro Tip: Watch Lesson 6 of the Kramis series to learn advanced carving techniques for pro-level results.
Lesson 7: Glueing the Rug
Apply rug adhesive (Roberts 6700 is a top choice) to the back of your rug to secure the yarn. Let it dry for 24 hours before moving to the next step.
Pro Tip: In Lesson 7 of the Kramis series, you’ll see how Swiss artisans use a “double-glue” technique for extra durability.
Chapter 3: Finishing
Lesson 8: Cutting Down the Rug
Carefully cut the rug from the frame, leaving a small border of fabric. Trim any excess cloth and yarn for a clean finish.
Lesson 9: Using the KRAMIS-Tape
Attach the KRAMIS-Tape to the edges of your rug for a polished, professional look. This step ensures your rug stays durable and secure.
Lesson 10: The Final Touch
Add a non-slip backing (like this one) to protect your floors and keep your rug in place. Admire your masterpiece—you’ve just created a custom tufted rug!
Why Learn from Kramis?
The Kramis Tufting Tutorial Series is your ultimate resource for mastering rug tufting. From stretching the fabric to adding the final touches, these tutorials break down every step with precision and clarity. Whether you’re a beginner or looking to refine your skills, Kramis’ expertise will guide you every step of the way.
Ready to Create Your Masterpiece?
Now that you know how to master design transfer for rug tufting, it’s time to get started! For a complete beginner’s kit, check out our affiliate-recommended supplies. And don’t forget to watch our Kramis Tufting Tutorial Series for step-by-step video tutorials.
FAQ
Q: Can I use a regular marker for design transfer?
A: It’s best to use washable markers to avoid permanent marks on your cloth.
Q: How do I choose the right projector for tufting?
A: Look for a mini projector with adjustable focus and brightness, like this one.
Explore More:
Want to take your tufting skills to the next level? Check out this fantastic guide on The Art of Transferring a Portrait to a Tufting Canvas for tips on creating detailed, lifelike designs.
